How to Actually Hang Art on Your Walls

Pop Construct, Artistry, Bloomington, Minnesota, 2019. Pop Construct featured work by Teresa Paschke (center work), Jennifer Drinkwater (works left and right), and Robert Slotterback.
Greetings!
In this final installation (see what I did there) of how to hang art on your walls, we’ll be going over the nuts and bolts (ha) of the hanging part of the process, like what tools you’ll need, a formula to ensure eye level viewing, and tips for showcasing your collection in the best possible light (it’s just too easy).
If you’ve just now stumbled across this series, please check out the previous posts:
You’ll find more context and far fewer bad puns.
I was also named an expert in a Rent. article: 20 Gallery Wall Ideas: Expert Examples and Tips for Inspiration. This is a great resource for designing personalized spaces in your home or office.

Rathbun Lake, acrylic on wood panel, 36” x 48”, 2019. Limited edition prints available here.
An Option: Picture Rails, Bookshelves of the Art World.
Rather than relying on nails and wire, some folks are opting for a more flexible solution.
[Enter picture rails.]
These shelves function as a more casual and flexible display, allowing you to rearrange your art collection any time the mood strikes.


But if you decide to hang work, Wire is GOAT.

“Indeed.” - Omar Little.
Omar magnet photo credit: Matt Foss. Thanks, Matt! (I painted this circa 2011-ish, I think.)
This universal truth applies to David Simon’s magnum opus and artwork-hanging-apparati.
Take a look underneath a piece of art. Ideally, you’ll find hanging wire secured by a D-Ring or steel plate. You may, however, discover the infamous sawtooth, particularly if the piece is lightweight or came from one of the big box stores.
Folks, look. Don’t ever rely on a sawtooth hanger. Most galleries outright prohibit them. They just aren’t secure. I’ve seen sawtooth-hung prints fly off the wall simply because somebody shut a door loudly or walked with purpose across a room.

D-Rings + Wire.
The way to go.

Sawtooth Hangers.
Always a bad idea.
The Art of the Hang: the actual artwork installation process.
Materials You’ll Need:
An “art station” set-up, like a folding table or a kitchen table. This will be where you carefully set artwork to measure. It also prohibits toddlers, well-meaning spouses, or animals from walking on and into framed art.
An old sheet to cover the table. Again, this just helps to protect the art and your table.
A measuring tape
A pencil
Scrap paper (I prefer post-it notes.)
Hammer/nails or drill/drywall or wood screws (Screws are more secure than nails.)
A level
A stud finder (Necessary to secure very heavy artwork)
Windex
A clean rag
Hanging artwork on a brick wall is kind of a nightmare, but man, it sure does look cool. You’ll need to add a hammer drill to your list of tools.
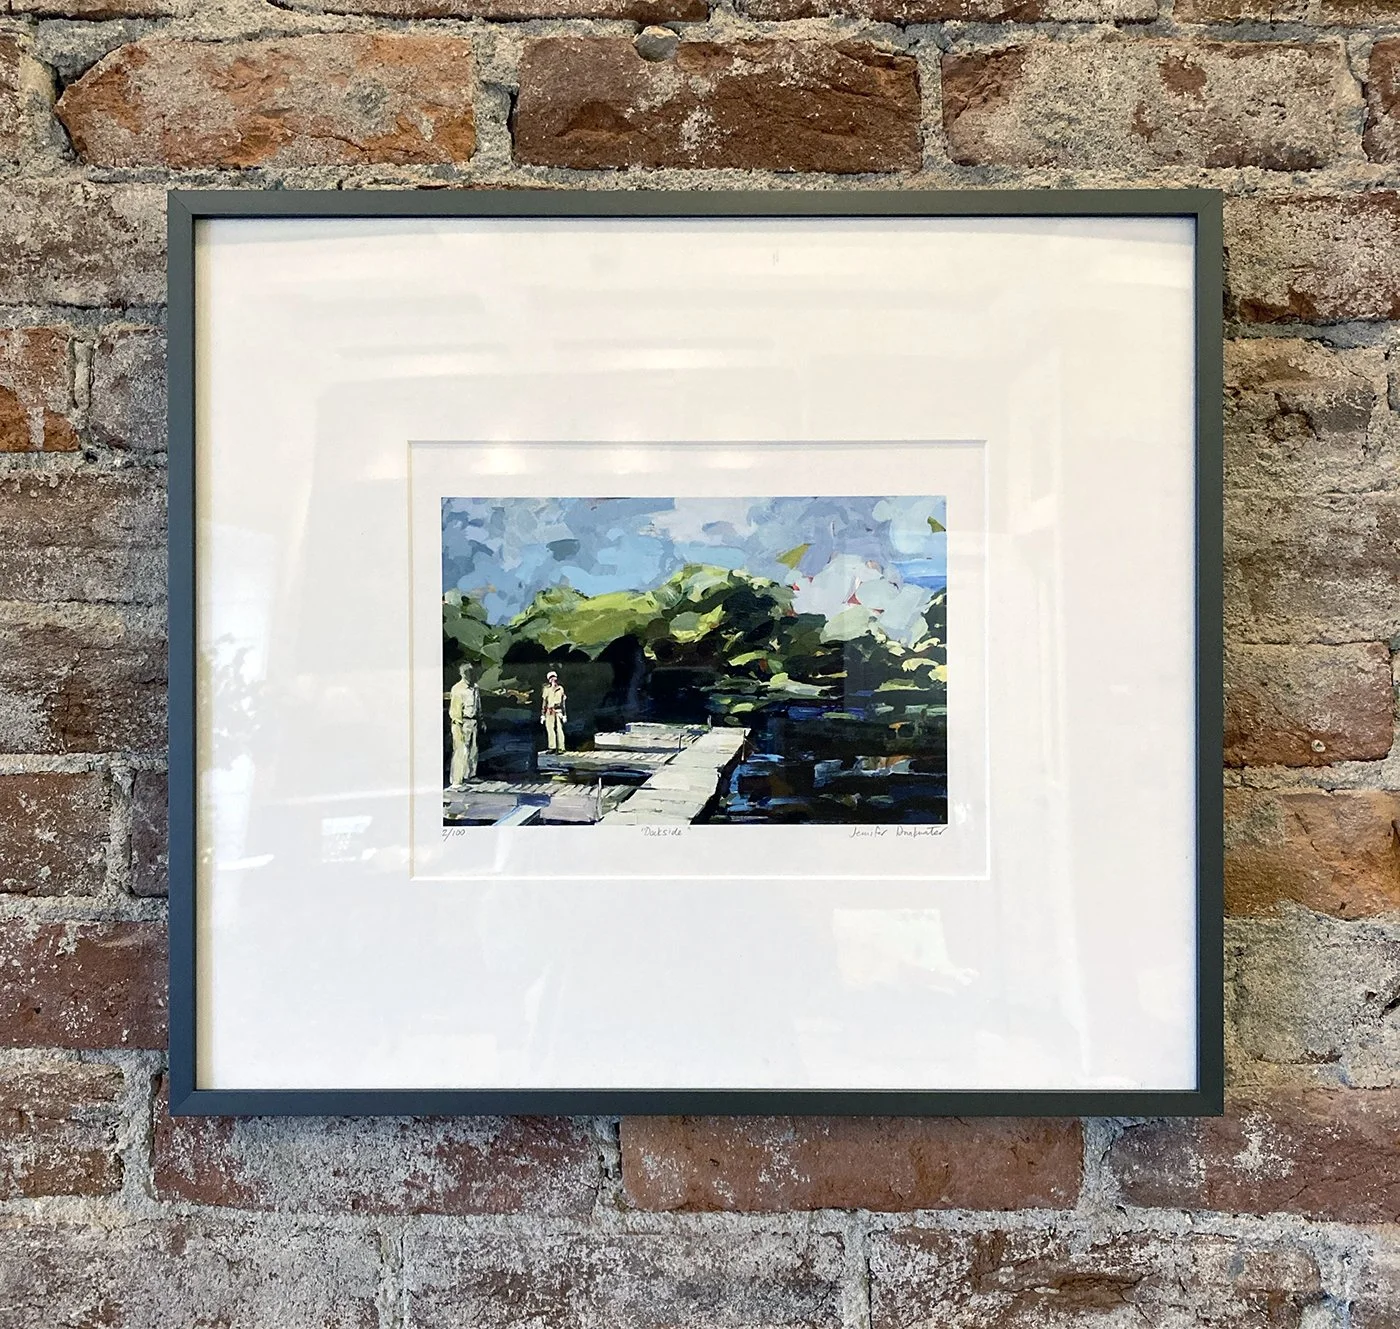
Dockside, limited edition print, 9” x 12”, 2020. Prints available here.
Some General Advice Before You Begin:
My preference is always to install everything in one fell swoop. However, in normal life situations (i.e. not a gallery or museum), this really only occurs when you’re moving into a new home or office, or you’ve just finished a remodeling project. Most of the time, we install pieces one at a time. Whenever you acquire a new piece for your collection, I’d encourage you to evaluate the rest of your space to see if pieces need to shift. I mean, you’ve already got the tools out, right?
*** ALSO! This process is so much easier to do with an extra set of hands. The spreadsheet-oriented person can calculate the formulas, while the more handy individual can drill the holes. Having two people hang larger pieces is ideal.
8 Easy Steps to Install Art on Your Walls:
Begin by placing artwork against the walls in potential locations. Do not begin installing until all the work is placed and you’re happy with how it looks.
Carefully adjust spacing between the work. Although there is no hard and fast rule for this, generally speaking, diptychs or triptychs are usually hung closer together than unrelated work. Notice where your light fixtures are – you want your collection to be well-lit, or at least not shoved into a dark corner.
*** You may have a really heavy piece in your collection or say, a large antique mirror. For something really cumbersome, you’ll want to anchor that piece into a stud with wood screws rather than just attach it to drywall, hence the stud finder.
Once all of your collection is placed and accounted for, let the math begin! The following formula results in the center of each piece landing 57 inches above the floor, or roughly at eye level. Museum and gallery standards range from 57-62 inches above the floor. If you have tall ceilings, you may want to adjust for a higher eye level.
First, you’ll want to jot down two measurements: A) the height of the artwork, and B) the distance between the top of the frame and the hanging wire when the wire is taut (see photo below).

You’ll want to measure the distance that between my thumb and forefinger.
The working formula is as follows:
((Height of artwork/2) + 57) – (distance between the top of the artwork and tension of hardware).
For example, say I have a framed print that is 36 inches high. The distance between the top of the frame and the taut wire is 4 inches.
Measure the height of the artwork. 36 inches
Divide this number by two. 36/2 = 18 inches
Add this number to 57. 18 + 57 = 75 inches
Subtract B from this number. 75 – 4 = 71 inches.
This final number is where you will insert your nail or screw. Mark it on the wall in pencil or use a post-it note. Hanging the print at this height will ensure that the center of the print is 57 inches from the floor.
4. Drill a drywall screw into the designated areas. Carefully hang the work.
5. Make sure each piece is level.

Aaron is both the more spreadsheet-oriented and more handy one of this couple. Lucky me. :)
6. Clean plexiglass or glass with Windex and a clean rag.
7. If you have track lighting, adjust to showcase your collection.
8. Bask in the glow of your awesomeness. Cheers!

Stacking pieces is a bit trickier. Formula-wise, you can consider both pieces to be one uber piece, meaning that the total height would include the height of each painting, plus the space between the two. Or you can eyeball it. I won’t tell.
Limited edition prints of Downtown Marks (lower image) available here.